Pages

Tuesday, December 31, 2013

Good Bye 2013...Hello year of Choices!!

It's the last day of 2013 and it's a day for looking back and looking ahead. 

If you've been around since last year, you know my One Little Word for 2013 was "NEW." I wanted a year of new passions, new dreams, new plans and a new, more confident me. And...I think I fulfilled my 2013 One Little Word. 

I quit my job so that I could focus on my art and my family and it was one of the best (and scariest) decisions of my life. 

I put myself out there artistically and tried new things that in the past I was too intimidated to even try. And you know what? I found out...I'm actually pretty good at them. 

I took steps to figure out my little place I this big industry of paper crafting and found a home with Susan K Weckesser and The Craft Warehouse Design teams and a couple of temporary homes with Authentique Paper and Want2Scrap. 

I learned a lot this year about grace, both for myself and others and learned to let go of the fear of being judged and just be authentically who God has made me to be. 

So...as we say good-bye to 2013, it's time to pick a new One Little Word. 

This year I picked: 
It might seem like a weird One Little Word, but let me explain..

Each day, just like I choose my outfits, I get to choose my attitudes, my thoughts and my actions. 

I can choose joy or mourning. 
I can choose grace or judgement.
I can choose faith or fear. 
I can choose trust or solitude. 
I can choose just getting by or I can choose a full life. 

My life is what I choose and my choice is for it to be awesome. 

What about you? What's your One little Word for 2014? 

Leave me a comment...I would love to hear it. 

Thank you so much to all of you who have made it YOUR choice to go along the creative journey with me.

Here's to 2014!! 

XOXO--Keri


Friday, December 20, 2013

Quick and Sweet Gift over on the Susan K. Weckesser Blog!

I'm always super excited when it's my day on the Susan K. Weckesser blog!

Head on over there today and see my quick and sweet last minute gift idea...the beautiful altered bottle (in it's former life it was a maple syrup bottle from The Fresh Market!)


Tuesday, December 17, 2013

Sometimes things just don't go as planned...

Did you ever decide to take a leap and then things just didn't work out as planned?

Well that happened to me recently. 

I decided to try and participate in a small craft fair that was being held at my kid's school. I bought the materials and spent hours and hours making projects. I was set to go!

Then...snowpocalypse hit, keeping us home-bound for 6 days and due to reschedule events, they ended up canceling the event. UGH!

In the beginning I was a little sad that I had spent all this time and money and now what was I going to do with all of these great things I had created.

Then...I thought...ETSY!

So I decided to take my failed plan and give it a little tweek!

My etsy shop will be for many projects you have seen on my blog and other blogs.

Ready to shop? 


Below are some of the projects from the canceled show...just to tease!

XOXO,
KERI


Friday, December 13, 2013

Pin-Win-- DIY Light Box

If you're like me, you love Pinterest, but rarely actually do anything with them. 

However, today I wanted I share my most successful "PIN-WIN" 


This pin leads you to a tutorial on how I make this easy and amazing DIY Light Box. 


My hubby made the base of mine using the box from a new piece of furniture we had just bought. 

Here is mine: 


My studio table is a 6ft old dining room table. The canvas you see is an 8x10, so you can see that it is easy to accommodate large projects if you make your frame larger. (This picture makes my canvas look like it's floating! Lol) 

Check out the tutorial by Flax and Twine. I'm sure you'll love it! 

And thanks Flax and Twine for a great and easy to follow tutorial. 

Xoxo

Keri

Thursday, December 12, 2013

Banners of Hope

Hey Lifers!

I am so excited to share this with you today. 

I am honored to be participating with the CHA Banners of Hope cause this year at Crop and Connect Annaheim. 

Banners of Hope is an amazing group of artists who gather together to use their talent to inspire and give strength to those struggling in hospitals and through other tough situations. 

At CHA next month, banners will be displayed during the show before being shipped all over the country to give people hope and encouragement. 

For me...I went through so many mental options and stared at my blank piece of fabric forever (fear of the blank "page!")

Finally, I just grabbed a bunch of my favorite Tattered Angels colors and made my background, with no real thought in mind. I just needed to get rid of the white. 

After I was done, my hubby came in and said "Hey...that looks like a face!" And of course I was like "Your're crazy...it's just an abstract background." But..the more I looked at it, I could see the details he was taking about. 

So...here is the finished products: 


I've never been a drawer of figures, but I'm finding I kind of like it. This is my first face and it took a little while to make me happy, but I think she is beautiful. 

Here is a few closeups:


The whole project is done with black and white acrylic paint and Tattered Angels Glams, Mists and Glazes on canvas fabric. The fabric was so generously donated by Meridith Fabric. 

The title came at the end. The colors and the fact that her eye was closed made me feel like she was just taking a moment, within the storm she was going through, just to breath and remind herself  that she is strong and can make it through this. 

Want to see more Banners of Hope? Check out Pinterest an search #bannersofhope !

Are you feeling inspired to help others? Let's see YOUR Banner if Hope. 

Until next time...stay creative and spread hope!

XOXO

Keri

Tuesday, December 10, 2013

Feeling Sketchy Post for Susan K Weckesser!

Yesterday was my day on the Susan K Weckesser Blog My Sweet Earth!

Normally, I am not a scrapbook sketch person, but when I saw this one on The Paper Issues Instagram feed, I knew I had to use it:


I saw those triangles and I immediately thought: Susan's Celebrate the Simple Stamps for Unity Stamps!


Here is what i came up with:


I used Basic Grey's Persimmon line because I thought the colors went so well with my vintage photo (and yes...that is me WAY back in 1983!)

Wanna see more?

Click Here to head over to Susan's Blog!

Until Next time Friends!!

XOXO

KERI

Wednesday, December 4, 2013

Want 2 Scrap Guest Post!!

I have been sitting on this project for over a month so I am so happy to finally share!! 


Head on over to Want 2 Scrap's blog for full details and more yummy pics!! 

http://want2scrap.com/blog/guest-designer-keri-woodall-sallee/

Until next time...Stay Creative!!

Xoxo-Keri

Monday, November 4, 2013

Hand-made Christmas-My Wish Book

I'm so excited to be featured on Susan K. Weckesser's Hand-made Christmas Love Campaign today!!

My project is " My Wish Book"


For more details, head on over to Susan's Blog: My Sweet Earth

A BIG Thank you to our Christmas Love Sponsors:

Susan K. Weckesser (of course!)
Fancy Pants Designs
Canvas Corp
Tattered Angels
7Gypsies
Core'dinations
May Arts Ribbons


Also at the blog....


To start off this wonderful year 5th year of the Christmas Love Campaign, we are having a Hand-made Christmas Contest

 What you have to do: 

 *Follow along during our Hand-made Christmas event from November 2 - November 16, 2013 at Susan K Weckesser Inc blog

*Like the Christmas Love Campaign Facebook page ---> HERE.

 *Make your own Hand-Made gift. (it can be something you designed yourself or if you want try something that the designers have created please go ahead and have fun and do that!)

*Take a picture and post it on our facebook page. Or if you have Instagram post it there and tag it #craftuplove , #christlovecampaign & #susankweckesserinc so I see it! You can find me @ [SUSANKWECKESSER] on Instagram, so come follow me and I would LOVE to follow you! So much fun! 

 *Give your gift to a neighbour or stranger to make them smile! SPREAD THE LOVE! 

 *Come back to our Hand-Made Christmas post and let us know that you have crafted up some love and you will be entered to win a awesome prize pack from the above sponsors. The prize will include lots of goodies so you can craft up more love! How awesome is that! You have until November 17, 2013 at midnight MST to enter. Have fun! COME & JOIN US!

Tuesday, October 22, 2013

My Day...with Authentique Paper!

Jazzed...Excited...Freaked Out...Stoked...Ecstatic...

All these describe how I feel today.

I have the HONOR of being the featured Guest Designer today for on of my favorite companies Authentique Paper.

If you are a follower of scrap companies, you know that Authentique has only been around a few years, but has really made a SPLASH in a short time. Their patterns and colors are versatile, while the texture and weight of their paper makes them VERY easy to work with and do all types of crafts. Their stickers sheets (they call them "details") comes with words, alphas and every kind of embellishing sticker combo you would ever need!

For this guest spot, I was sent their "Thrilling" Collection. Full of a variety of oranges and vintage images, it was a lot of fun to play with.

For the complete post, head on over to Authentique Paper's Blog.

Here are a few more pics that didn't make it into the post and a quickie tutorial!

First UP... 
My "Thrilling" Shadow box


The "shadowbox" is actually a fake. It's just a chunky 12 x 12 canvas, turned backwards!

The frames and bow are made from dies by Vicki Chrisman for Accucut and the bottles are 7Gypsies.

Everything else is just paper, glue and Authentique Details Stickers.

Here is a couple of new closeups!


NEXT...
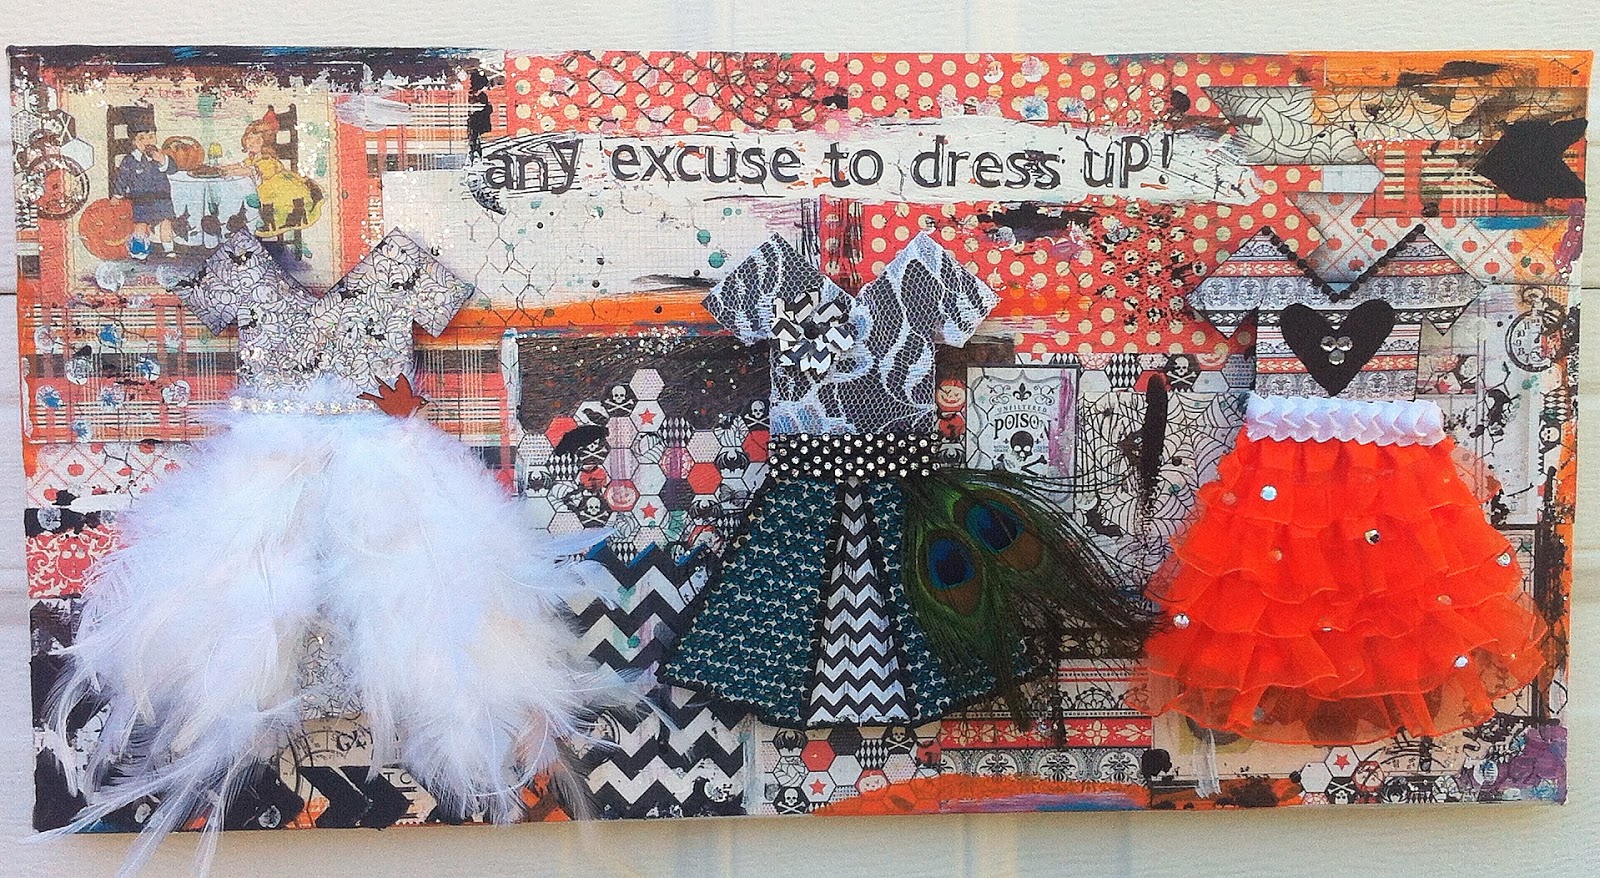
"Any Excuse to Dress Up" Mixed Media Canvas


I really wanted to do one piece that was just crazy and fun. 

I started out by making a 5 Origami Dresses from the Authentique 6 x 6 pad from the "Thrilling" Collection.

My original idea was a little different, but when I decided on this 20 x 10 canvas from Hobby Lobby, I decided to narrow my dresses to just 3.

Here is where I found my tutorial for my dress: Origami Dress Tutorial. It was my favorite out of all the ones I checked out.

A little tip here...during the step where you are folding up to make the bodice, flip the project over to make sure your bodice is all enough for your project. Mine was not and I actually cut the tops off my origami dress and hand-cut new ones.  Took some time...don't make my mistake! LOL. 

All of the dresses are set on a stack of corrugated cardboard scraps to give them height off the canvas.

Here is a close-up of all three dresses:

It's hard to tell in picture, but for the Peacock Dress, all the turquoise you see on the skirt is bling that I bought at Hobby Lobby. The fact that it came in long "sheets" of 10 x 60 helped fill the skirt in pretty fast. 


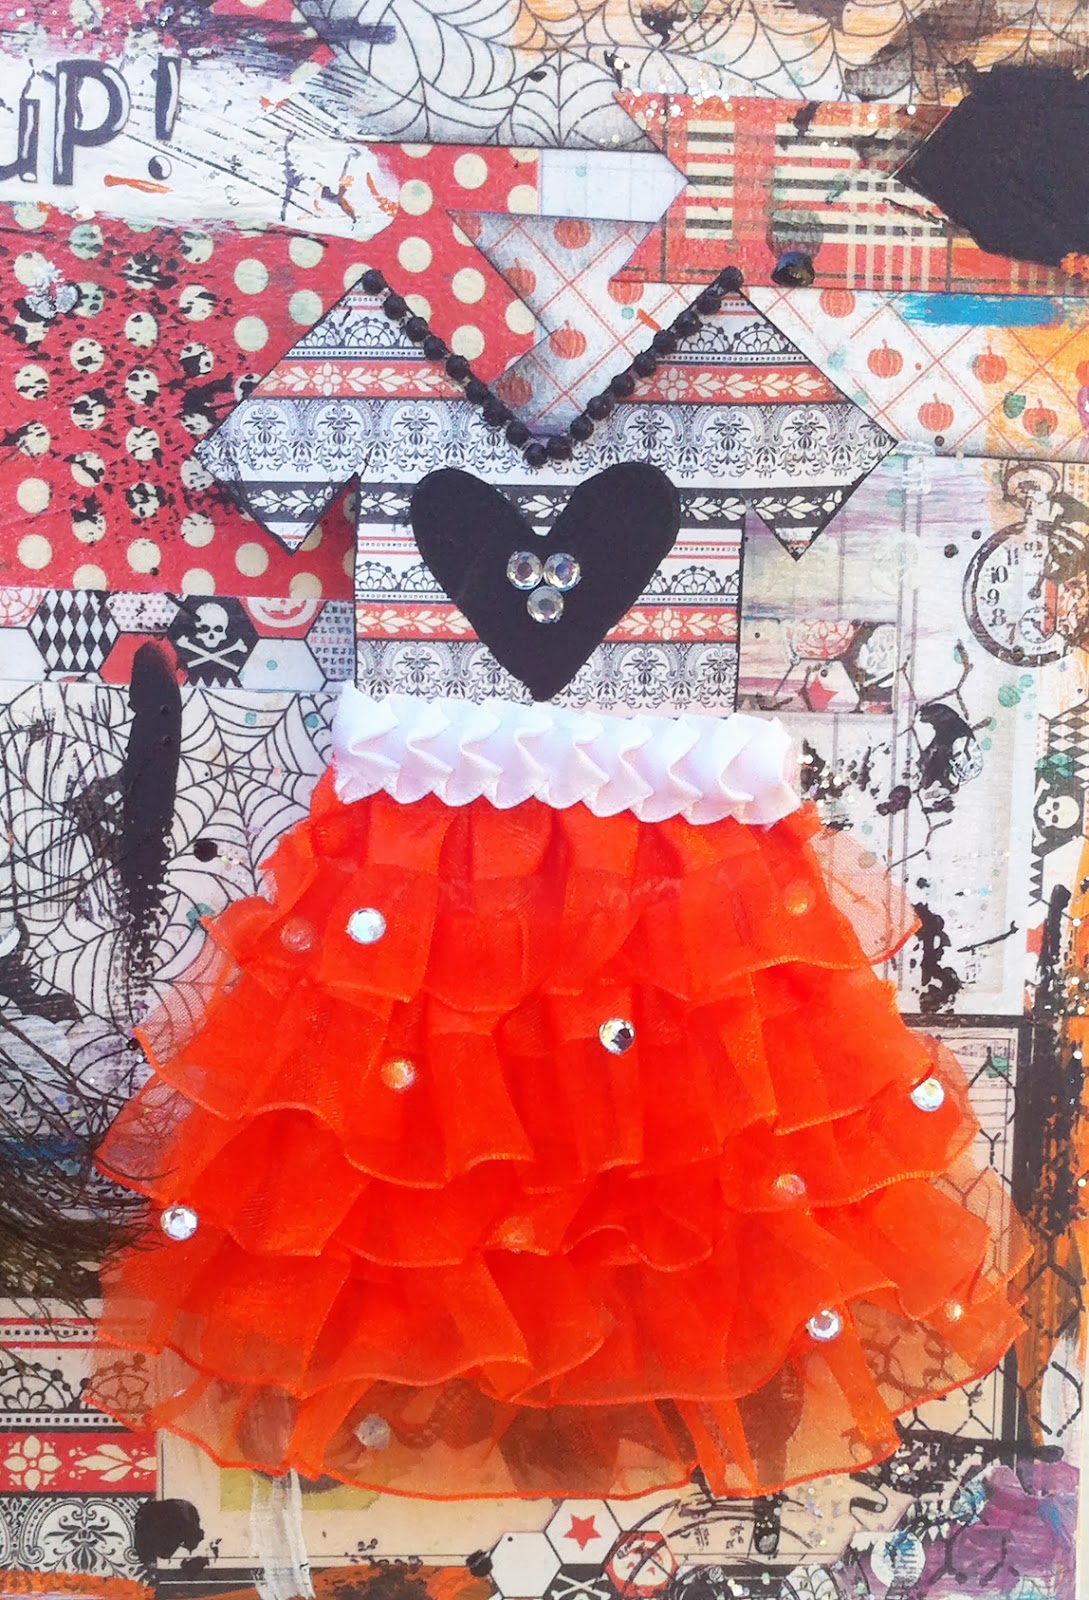
This skirt is made of layered ruffle ribbon, loose bling and some additional ribbon. The heart on the shirt was made with Modeling Paste and a Heidi Swapp Stencil.  


This is my favorite! Think: Couture Bride of Frankenstein. She's got her pats and spiderweb's that are covered in glitter glue, tons of loose feathers make up her skirt, along with a "diamond" waistband and orange birdie for good luck. 

For the background, I Modged Podged paper from the "Thrilling" Collection, before splattering and painting it up with glitter glue, acrylic paint, Tattered Angels and Modeling Paste colored Black through a Heidi Swapp Stencil.

Lastly....
"Monsters in the Trees"


Here is a quick tutorial on how to make this background:

1) First...paint you wooden piece with acrylic paint. I actually added a little gloss medium to my 2nd and 3rd layers because I decided I wanted more gloss. You can see the difference in the finishes:


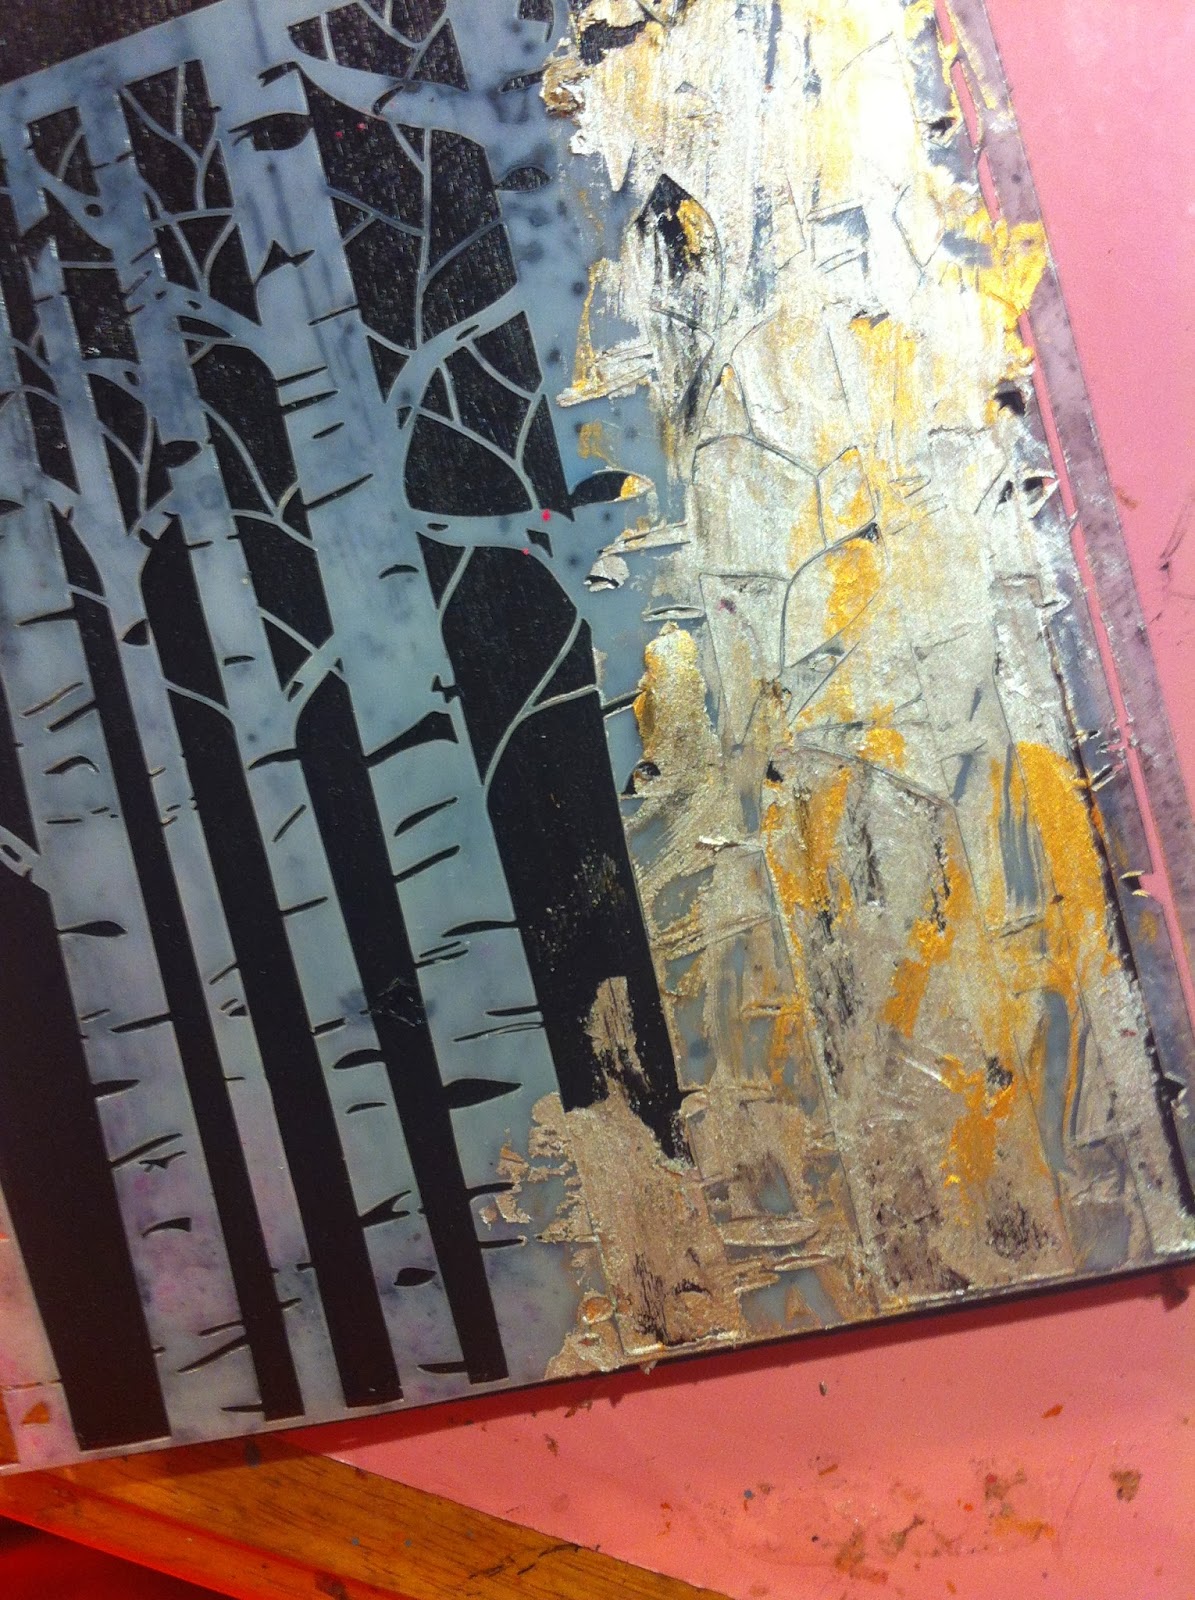
2) I used a Forrest Stencil from Crafter's Workshop (it's one of my favorites!) The size is 6x6, so it was perfect for my 5x7 piece. 


3) The medium I used for my background is Viva Inka Gold in Gold and Silver.

4) Starting with my silver, I used a putty knife to draw my rub over my stencil. I would then occasionally grabbing a little of the gold as well. Continue this process until you have covered your whole stencil. 


5) Carefully remove your stencil and your done! Inka Gold is very good for this technique because it is so thick that it doesn't seep under your stencil. As you can see, all of the edges are very crisp.


I didn't go all the way to the top because I knew I was planning a big collage of elements up there. Once my elements were in, however, you'll see that I went back in at the very top and added a little bit more with my stencil. It made the piece more "finished." 

It has been "Thrilling" being a guest designer for Authentique Paper and hope I get to do it again sometime.

Remember...you can go here-Authentique Paper Blog-for more pictures and the full blog post.

Until next time...stay creative!

XOXO,
KERI

Wednesday, October 16, 2013

UPGRADE!!

Hello Followers!

I'm so excited to share some news with you all!!

As you know I have had the awesome privilege of being a guest designer for my new friend Susan K. Weckesser over the last 6 months.

This past Saturday she released her new 2013 Design Team and guess what...what I'm on it!


I am honored to be named with these other amazing artist and I can't wait to share with YOU some amazing creations featuring Susan's products!

Inspiration...coming soon!

XOXO
KERI

Wednesday, October 2, 2013

One Pic Wonders

Recently I was going through some scrapbook layout pictures for a design team call (fingers crossed! LOL) and I noticed a trend...I tend to only scrap 1 picture on a layout.

I tried to figure out why I do this and here's the 2 answers I came up with: 

1) I like products...so, if I have too many pictures, it just doesn't leave a lot of play room.

2) I tend to only print out pictures that I absolutely LOVE, so I don't usually have multiples from one event on hand when I start a project (and who wants to stop working to run and pick up pics from a 1 hour place!?)


Here are 2 of my most recent "One Pic Wonders!"

"Cheryl"


The Beautiful Lady in this picture with me is the fabulous Cheryl Boglioli. I met her a few CHA's ago and there was an instant connection. She is my birthday twin (March 13th!), my soul sister and my mentor. She has been amazing to answer all my questions as I jumped into trying to "be creative" for a living. She has supported me in taking steps that were scary and is just all around fabulous.

I used Glitz's Design's "Color Me Happy" line because the name and colors were just so appropriate! 

I wanted to layout to feel like it was a bunch of pictures kind of just thrown on a desk, so I cut my paper all in similar sizes and shapes to my picture.

Getting the whole story of us on a page was going to be a little difficult, but I didn't want to do "hidden journaling" since the whole purpose of this layout was to tell about us. So I decided to journal in sections around the center focus and then connect them with a "follow" arrow, to make it easier to read the journaling in order.

Adding a little washi tape (by Queen and Co and The Paper Studio) added some fun elements and a splash of color to finish it off.

"You're Never Blue When You have Cousins"


I made this layout for a color challenge for Scrapbook News and Review Magazine, but I wanted to go beyond the obvious of making it blue in color, but since BLUE can also mean sad, I had to think kinda hard to come up with some way to use it that wasn't depressing! LOL.

I came across this picture of my two oldest kiddos and my nephew and I love it because they are SSSOO HAPPY together...hhmm...I thought...happy is the opposite of sad...sad means blue...that was my angle!

I started with a sheet of Pink Paislee's Mistables Paper in a hexagon shape and used a couple colors of Tattered Angels mists to make my background. Using lighter and darker blues gave my background depth instead of one flat color. I also left some places white to give it a little bit of a distressed look.

For this layout, I dug in my stash and found some yummy embellies that I had owned for a while, but had never used:

* Acrylic Photo Cover from My Mind's Eye-It added my border and my flowers to my picture!

* Canvas tag by Basic Grey (on left side)-Added some great texture

* Metal "Happy" (Pink Paislee) and "Three" Tag (Jillibean Soup)-these act as almost a "second" title

* Metal Flowers Brads and Acrylic Letters-The Paper Studio

* Grunge Key (Tim Holtz) and Wooden Letters (Pink Paislee)

I finished it off with some sprinkled and splattered blue Tattered Angels glaze (because kids are messy right?) and these fantastic little silver dots from a company called Candi Dots (this is a company out of the UK...check 'em out!)


What about you? Are you a one pic wonder or a fill-the-page kind of scrapper?

I would love to see your style! 

Leave me a comment!

Until next time friends...stay ONE-derful and stay creative.

XOXO,

KERI


Tuesday, October 1, 2013

Special Guest-Broken Girl


I am honored today to be featured on the Broken Girl blog, sharing my story of brokenness and transformation.

For a long time, I worried about sharing my past because I was scared of being judged.

However, I am now at this point... My embarrassment is far less painful than the hurting and suffering of those who NEED to hear my story and those who choose to be judgmental...my story is not for them anyway.

My story is hard to read; even for me at times, but it is my story and it has a happy ending.

I hope you will hope over there and read, not only my story, but some of the other entries on the blog.

My friend, Keri Bullington and Jennifer Watson, have an amazing heart for the hurting.

God Bless and have an amazing day.

XOXO

KERI

Saturday, September 28, 2013

List Yourself #11-Let's Get Excited!!

List Yourself #11

Life can be a rollercoaster, can't it? 

One minute your chugging up hill, struggling the whole way and the next minute your coasting down, the wind in your face and butterflies in your stomach.

So today...let's focus on the EXCITING PART!


Here's my list:

* That moment, after the last push, when I heard each of my 3 kids cry for the first time

* The moment I crossed the finish line of my first half-marathon

* The First time I saw my husband...I can still tell you exactly what he was wearing and what he was doing

* The moment my husband got down on one knee in the middle of Steak N Shake (where we had our first date) and asked me to marry him

* The moment I finally let go of the anger over being adopted.

* Putting in my notice at my last job-the skies became the limits!

* Every time I get a new "like" on The Creative Life Studios Facebook page!

What about you?

What are some of your most amazingly, exciting, stupendously exhilarating moments?

I would love to hear about them! Leave me a comment!

Until next time creative friends...staying exciting...and stay creative!!

XOXO,

KERI 

Monday, September 23, 2013

Blog Hopping with the Susan K Weckesser Crew!!


Welcome to the 2013 Susan K Weckesser Inc Design Team Back 2 School Blog Hop.  Our Design Team and Guest Designers have created a week’s worth of great projects to bring you inspiration and fun -- all themed around Back 2 School. 

We encourage you to visit each member’s blog, leave a comment and maybe find a new blog to follow.

 After you have visited all participating team member’s blogs, go back to THE STARTING POST at Susan K Weckesser’s My Sweet Earth Blog and leave a comment letting us know which project either inspired you or touched your heart.

 Don’t worry, you have all week to take your time and go through the blogs. We’ll feature a few each day at Susan K Weckesser Inc, but will draw names from comments left on THE STARTING POST for our grand prize.

Here is the list for ALL team members, but again don’t panic, we will highlight a few each day so you can come back and visit a few at a time if you want because we know how busy you Moms – and Dads – are! You have until Saturday night 11:55 PM CST to leave a comment at Susan K Weckesser’s My Sweet Earth.

HERE WE GO!!!!

I'm so excited to be an All-Star Guest Designer with Susan K. Weckesser and this week the designers and guest designers in her crew are having a little back to school blog hop!

You can't have "Back to School" with out first having an AMAZING summer, right? So I wanted to gather all of our summer fun in one place.

Here is my little project:


This sweet little album measures just 4.75 x 4.75, but holds an amazing 18 pictures! 

How you ask?

ENVELOPES!!!

By chaining envelopes together, you can form a versatile album in any size and shape you need!

Click HERE for a full tutorial I did on my blog last year on the basics of making an envelope album.


As you can see, it folds out into a fun according shape that makes it easy to display.


This is how you get 18 pictures in such a small album! Hidden behind each picture is a card that holds 2 more pictures and journaling. I fell in LOVE with these square envelopes I found at Hobby Lobby! Adding my 4x4 square Instagram pictures made this album go together in a snap because there was no picture trimming! I didn't even have to cut paper for my inserts...I simply cut the cards in half that came with my envelopes. Easy Peasy! 


 I wanted to keep things simple because the pictures and paper were so great. I used a little Washi Tape (My Mind's Eye, Carta Bella and Queen and Company) and some wooden pieces (Studio Calico and Hobby Lobby) to accent the fun prints and colors of Susan's Paper. Using Susan's stamps from Unity Stamp Company on the wooden pieces gave them instant character!

I also used her "Celebration of Simple" pennant stamps by Unity Stamp Company to create my journaling spots on each page. Creative NOTE: Changing the placement of each spot keeps the album from feeling uniform when you reuse an  image like I did!


Here is a little side-view!

Here is a complete list of products used on this project:
Flowers: Michaels, Prima Marketing, Petalloo, Hobby Lobby
Envelopes and Inserts: Hobby Lobby
Twine and Adhesive: Canvas Corp
Paper: Susie B Studios (Susan K Weckesser)
Washi Tape: My Mind's Eye, Carta Bella and Queen and Company
Wooden Pieces: Studio Calico and Hobby Lobby
Pens: Sharpie and Sakuro
Ink: Ranger
Stamps: Susan K Weckesser for Unity Stamp Company
Rub-Ons: Fancy Pants Designs
Alpha Stickers: American Crafts

I hope you enjoyed my little project and it inspires you to remember all the summer fun you had now that the craziness of back to school is here!

Until next time creative friends, happy hopping!

XOXO,

KERI
Saturday, September 21, 2013

List Yourself #10-It's a Strange, Strange World

How are your lists going? 

Are you learning a lot about yourself? Are you remembering things that have been buried that made you smile or laugh or maybe cry a little?

Today...we are going to remember the craziness in our lives...or should I say...the strangeness! :)


Even though it's not my strangest place, anytime I think "strange place" I automatically think of my husband's last trip to Thailand. While he was there, he sent me this picture:


The story was that they were at a place where you got to "pick" your food....like Red Lobster where you pick your lobster out of the tank, except this was eel.

What he didn't show me until he got back was these...


Yup....that is a racoon and snakes....just waiting for someone to make them into lunch.

Still makes me cringe and shiver!!

What strangeness have you encountered?

I'd love to hear about it!

XOXO
KERI