Pages

Showing posts with label Stencil. Show all posts

Sunday, January 17, 2016

Life is messy....Bible Journal about it.

Good Morning Creatives!

How are you doing on this beautiful Sunday? Here in Arkansas it's super chilly with a chance for snow. BBBRRRR.

Today, I am up on The Crafter's Workshop blog with Part 2 of my "How to use a TCW Stencil to make your own stamp."

Did you miss Part 1?

You can see the full article here: How to Make Your Own Stamp with TCW Stencils.

And the complete Snapguide right here!


Check out How to Use a TCW Stencil to Make Your Own Stamp by Keri Sallee on Snapguide.

For Part 2, I wanted to use my new stamp in a Bible Journaling piece. I used the verse 2 Samuel 22:30 that says "With my God I can jump over any wall." 


I wanted to show the messy life can be with my design, but the scripture is the supports the thought that no matter how messy life gets....with God we can "Leap over walls."

Here is a closeup of the stamp we carved in Part 1. 


Head on over to The Crafter's Workshop Blog for more details AND a complete video!


Leave me some love! I would love to see your stamps and your bible journaling pages!

XOXO,
Keri Sallee


Wednesday, October 28, 2015

DecoArt Mixed Media Haunts Challenge

Hello Creatives!!

I am BEYOND excited to share this project with you today!

As you know, I have been a little (or a lot!) obsessed with Sugar Skulls lately. So when I saw that DecoArt Media was having a design challenge for Halloween, I knew I wanted to stretch myself and do something that is COMPLETELY out of the box for me...a 3-D SUGAR SKULL!

I searched high and low for the perfect surface and I found this skull at our newly opened JoAnn Fabric and Craft Store. It is made of Styrofoam and I thought was creepily perfect!


We became very good friends....


Ready to see his transformation?


To make my roses, I used the 6x6 "Cabbage Rose" Stencil from The Crafter's Workshop. {see the end of the post for a complete supply list!}


I wanted to keep my pink roses the highlight of this project, so I kept my other details simple with flourishes and dots painted with various DecoArt paints.


I added some Junque and Gem stones from Marion Smith Designs to finish it up with a little bling


What is is about sugar skulls that are the perfect combination of creepy and beautiful?

I hope you enjoyed seeing my project as much as I enjoyed making it.

What about you? Have you tried something new? Maybe a product you've been scared of? Maybe taking your art off a canvas or out of a book and trying something fun and 3-D? Or maybe...you must need to START?

No matter where you are...You CAN DO IT!! 

Just try. 

One of my favorite authors, Neil Gaiman, has a quote that I love: 

So go and DO something...mistakes and all. :)

Until next time...
Keri

P.S. Shameless plug....PICK ME ANDY SKINNER!!!!!!!!!!!!! :)

P.S.S. Supply list as promised: 

DecoArt Materials

DecoArt Media
Fluid Acrylics: Carbon Black, Titanium White, Interference (Gold)
Gesso 
Modeling Paste 

Dazzling Metallics
Peacock Pearl 
Rick Espresso 
Festive Green
Crystal Green 

Americana 3D Gloss Enamels
Transparent Glass Writer: Black & Yellow

Americana Acrylic Paint 
Electric Pink
Purple Pizzazz
Citron Green

Other Materials
Styrofoam Skull-Joann Art and Craft Stores
TCW514S "Cabbage Rose" Stencil-The Crafter's Workshop
Junque & Gem Stones-Marion Smith Designs
Graphic Structure Paste-Daler Rowney


Tuesday, May 5, 2015

Art Journaling with The Crafter's Workshop!

Hello Lifers!

Today, I am sharing an Art Journal Piece on The Crafter's Workshop blog where I use 3 stencils from 3 different designers to make one harmonious piece!

Here's a sneaky peaky!


For more pics and full details, check it out here: 


XOXO,
KERI

Tuesday, November 25, 2014

Keepin' it Junky with The Crafter's Workshop

Hello Lifers!

I am so excited to be sharing my first project as a full-fledged member of The Crafter's Workshop Design Team!


Today, I am sharing my version of a "junk journal."


For more details, check out The Crafter's Workshop Blog: Keep it Junky-The Crafter's Workshop

XOXO,
KERI

Tuesday, June 10, 2014

Creating a Masculine Layout with Stencils

Hello Lifers!!

Today I am so excited to be sharing a mixed-media layout over on The Crafter's Workshop Blog.

Here's a little sneak peek!


Head on over to their blog for more details and a complete tutorial!


Until Next time...make your art intentional...not an after thought.

XOXO,

KERI

Wednesday, January 22, 2014

Tuts on Tuesday...on Wednesday?

Hello Lifers!!

Guess where I am?! I am sitting at LAX waiting to board a plane for...HAWAII!!

For Real! 

My hubby had to go on an emergency 2 week business trip there (he buys seafood...long story) and after he had been gone a few days, he was like "Wouldn't it be great if you could join me?" So only by the grace of God and Him working out a TRUCKLOAD of miracles, my mom and his mom were able to tag team our kiddos so that I could go to Hawaii with him until Sunday!

Woo Hoo!

Because of that...Tuesday tutorials are a day late, but I'm not gonna leave you hangin'!

This past weekend, I was working on a mini album project and got to play with one of my FAVORITE 2 tool: Modeling Paste and Crafter's Workshop's 12 x 12 Brick Stencil.

If you're not familiar with it, modeling paste is a white substance that is the consistency of canned frosting and when it dries, it stays 3D. You can smooth it out or leave it bumpy and you can mix it with acrylic paint to change the color (and by some voodoo magic...it doesn't change the color of your acrylic! Weird, I know.)

Here's a close up of what we will learn today 
(I will reveal the FULL project at a later date.)


This is the cover of a mini-album, but you can use the technique on canvas, burlap or even just a heavy weight paper. 

Supplies You'll Need to Duplicate this (feel free to substitute for you own needs!)

Modeling Paste 
(I used Liquitex I bought in the Art Section at Hobby Lobby)

Medium and Dark Brown Acrylic Paint

Rust Red Acrylic Paint

Tattered Angels Glaze in Saffron

Brick Stencil (again..mine is by Crafter's Workshop)

Ready? Here we go!


·       We are going to start adding some texture by mixing some light brown acrylic paint with our modeling paste and light scrapping or painting through the brick stencil.


o   You want your modeling paste/paint mixture about the consistency of canned frosting.
o   Start with a small amount..a little goes a long way and it doesn’t store well for future use.


·        Start from the top of your project and work down. Take caution when you lift up your stencil that you don’t damage you hard work!


·        If you are in a hurry, grab your heat tool and speed the drying time up!


·        Once it’s dry, let’s add a little dimension. Grab your rust red and darker brown. Using your fingertips,  lightly rub your bricks first with the red, then with the brown.


·        To add shimmer and more texture, grab your Tattered Angels glaze and your heat gun. (Make sure to shake up your glaze well!)
o   Lightly swipe your glaze over your bricks.
o   While it is still wet, hit it with your heat gun. Because of the acrylic base, the paint will bubble up and once it’s cooled, will be permanent


.
(Do as I say…not as I did! LOL! I decided-obviously-after I had done the next step...hence the blue! LOL)

There you go! You now have an easy and fun new technique in your creative toolbox!

Until next time my friends...remember...CHOOSE to make your ART intentional...not an after thought.

XOXO,
KERI


Tuesday, October 22, 2013

My Day...with Authentique Paper!

Jazzed...Excited...Freaked Out...Stoked...Ecstatic...

All these describe how I feel today.

I have the HONOR of being the featured Guest Designer today for on of my favorite companies Authentique Paper.

If you are a follower of scrap companies, you know that Authentique has only been around a few years, but has really made a SPLASH in a short time. Their patterns and colors are versatile, while the texture and weight of their paper makes them VERY easy to work with and do all types of crafts. Their stickers sheets (they call them "details") comes with words, alphas and every kind of embellishing sticker combo you would ever need!

For this guest spot, I was sent their "Thrilling" Collection. Full of a variety of oranges and vintage images, it was a lot of fun to play with.

For the complete post, head on over to Authentique Paper's Blog.

Here are a few more pics that didn't make it into the post and a quickie tutorial!

First UP... 
My "Thrilling" Shadow box


The "shadowbox" is actually a fake. It's just a chunky 12 x 12 canvas, turned backwards!

The frames and bow are made from dies by Vicki Chrisman for Accucut and the bottles are 7Gypsies.

Everything else is just paper, glue and Authentique Details Stickers.

Here is a couple of new closeups!


NEXT...
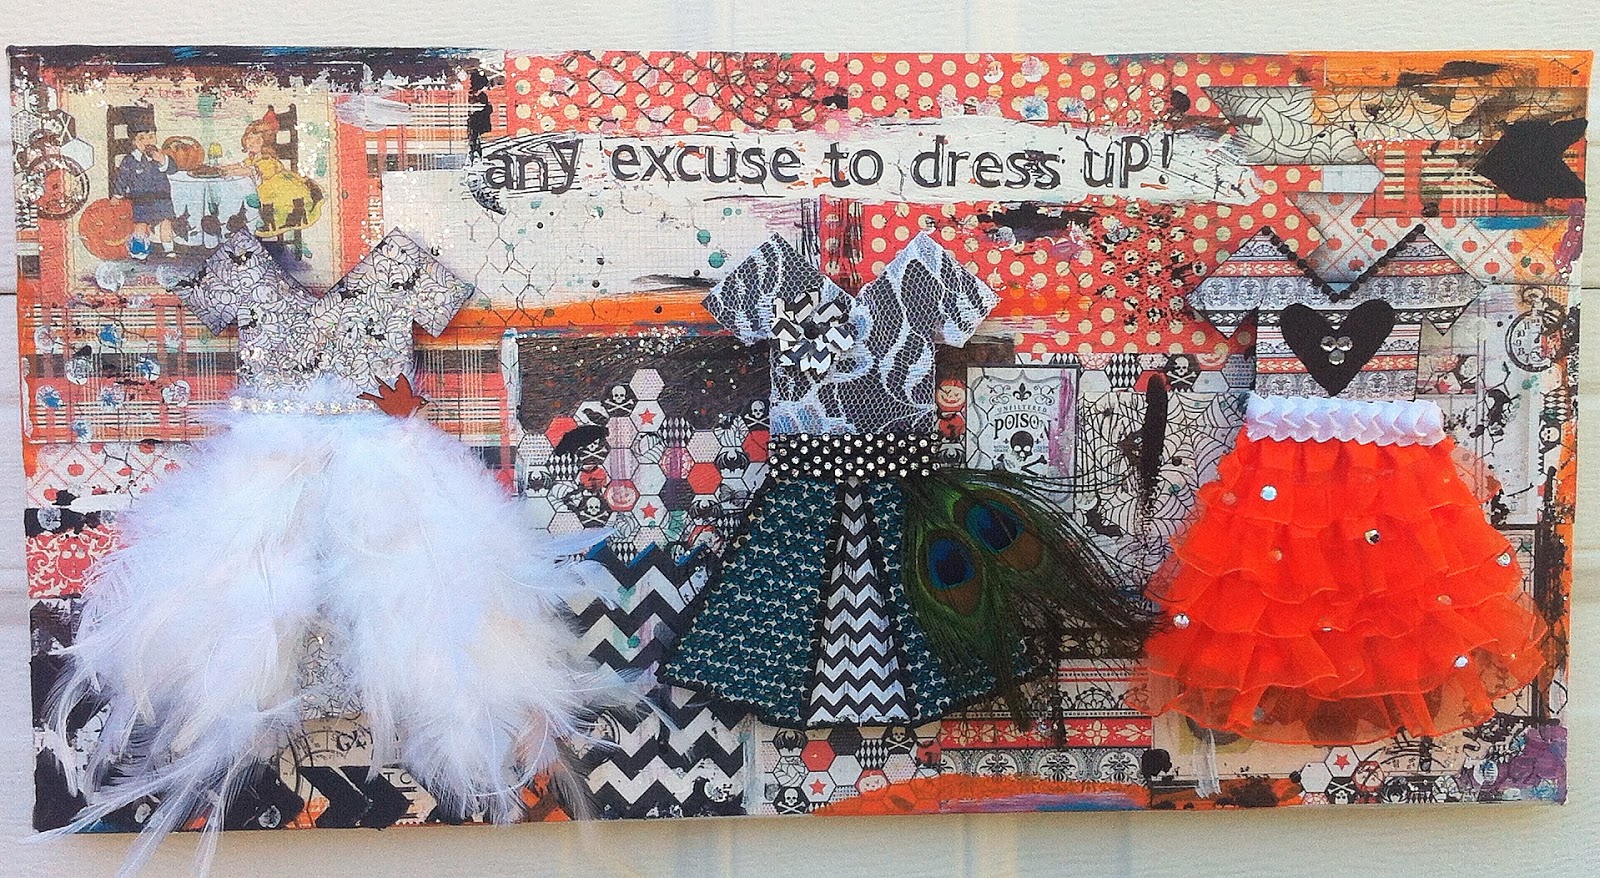
"Any Excuse to Dress Up" Mixed Media Canvas


I really wanted to do one piece that was just crazy and fun. 

I started out by making a 5 Origami Dresses from the Authentique 6 x 6 pad from the "Thrilling" Collection.

My original idea was a little different, but when I decided on this 20 x 10 canvas from Hobby Lobby, I decided to narrow my dresses to just 3.

Here is where I found my tutorial for my dress: Origami Dress Tutorial. It was my favorite out of all the ones I checked out.

A little tip here...during the step where you are folding up to make the bodice, flip the project over to make sure your bodice is all enough for your project. Mine was not and I actually cut the tops off my origami dress and hand-cut new ones.  Took some time...don't make my mistake! LOL. 

All of the dresses are set on a stack of corrugated cardboard scraps to give them height off the canvas.

Here is a close-up of all three dresses:

It's hard to tell in picture, but for the Peacock Dress, all the turquoise you see on the skirt is bling that I bought at Hobby Lobby. The fact that it came in long "sheets" of 10 x 60 helped fill the skirt in pretty fast. 


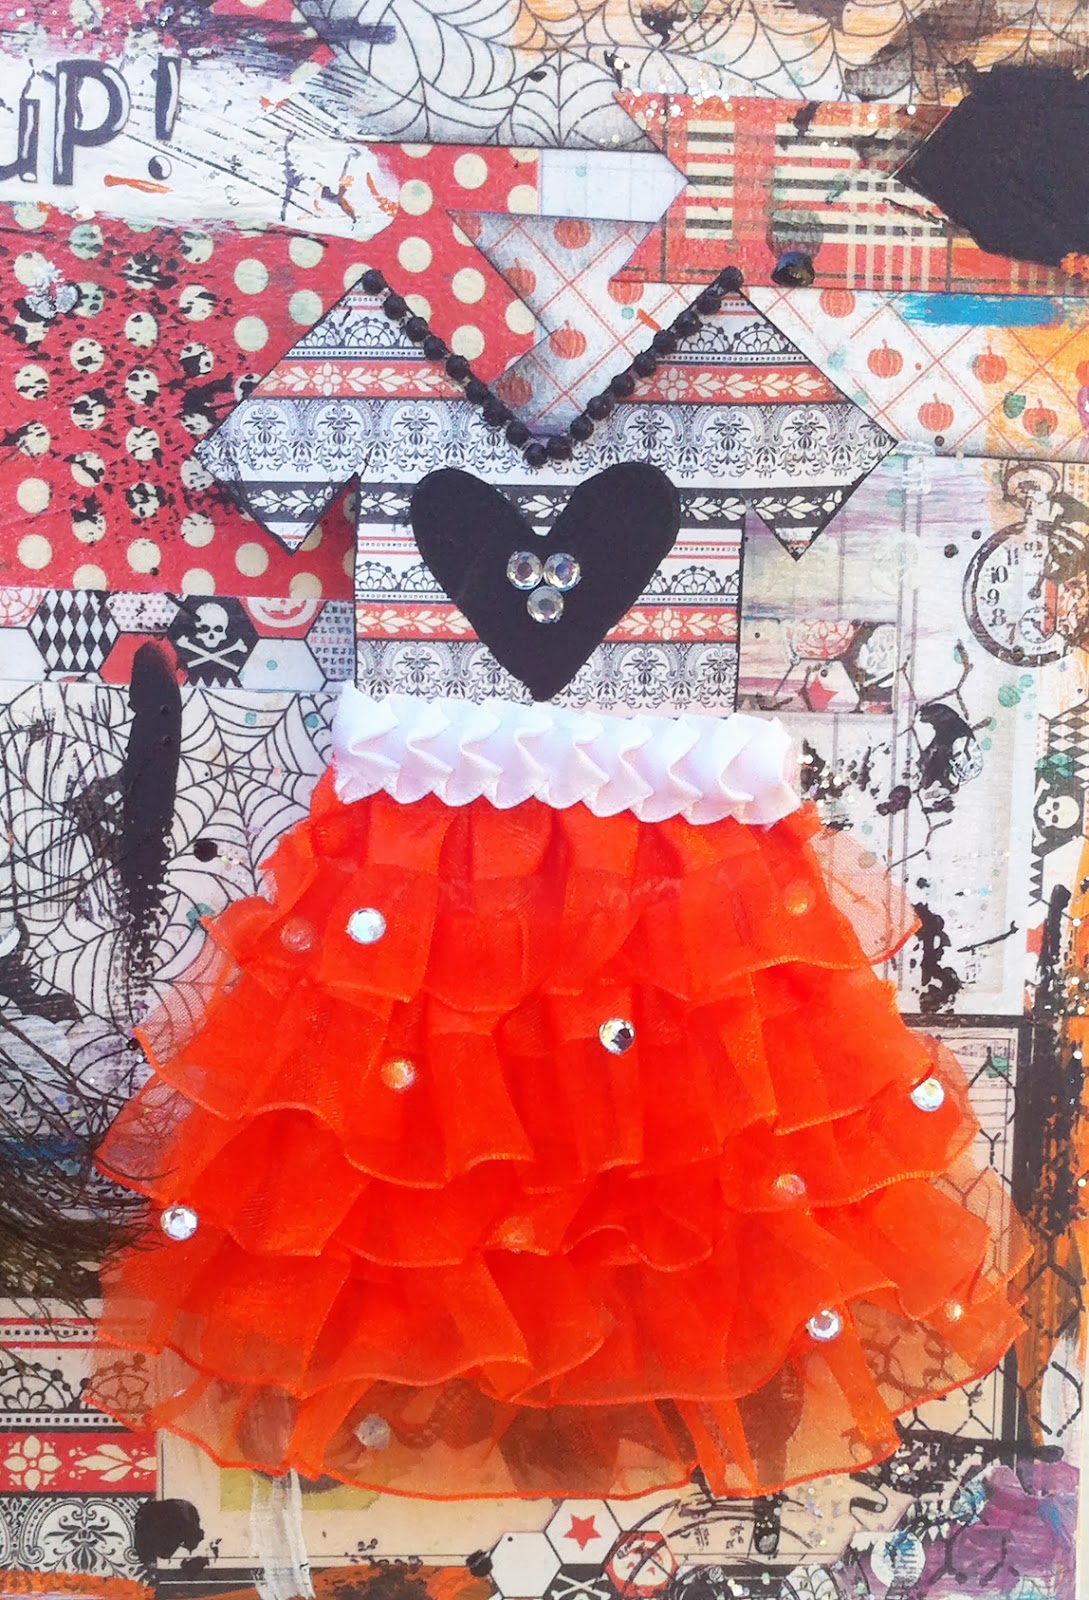
This skirt is made of layered ruffle ribbon, loose bling and some additional ribbon. The heart on the shirt was made with Modeling Paste and a Heidi Swapp Stencil.  


This is my favorite! Think: Couture Bride of Frankenstein. She's got her pats and spiderweb's that are covered in glitter glue, tons of loose feathers make up her skirt, along with a "diamond" waistband and orange birdie for good luck. 

For the background, I Modged Podged paper from the "Thrilling" Collection, before splattering and painting it up with glitter glue, acrylic paint, Tattered Angels and Modeling Paste colored Black through a Heidi Swapp Stencil.

Lastly....
"Monsters in the Trees"


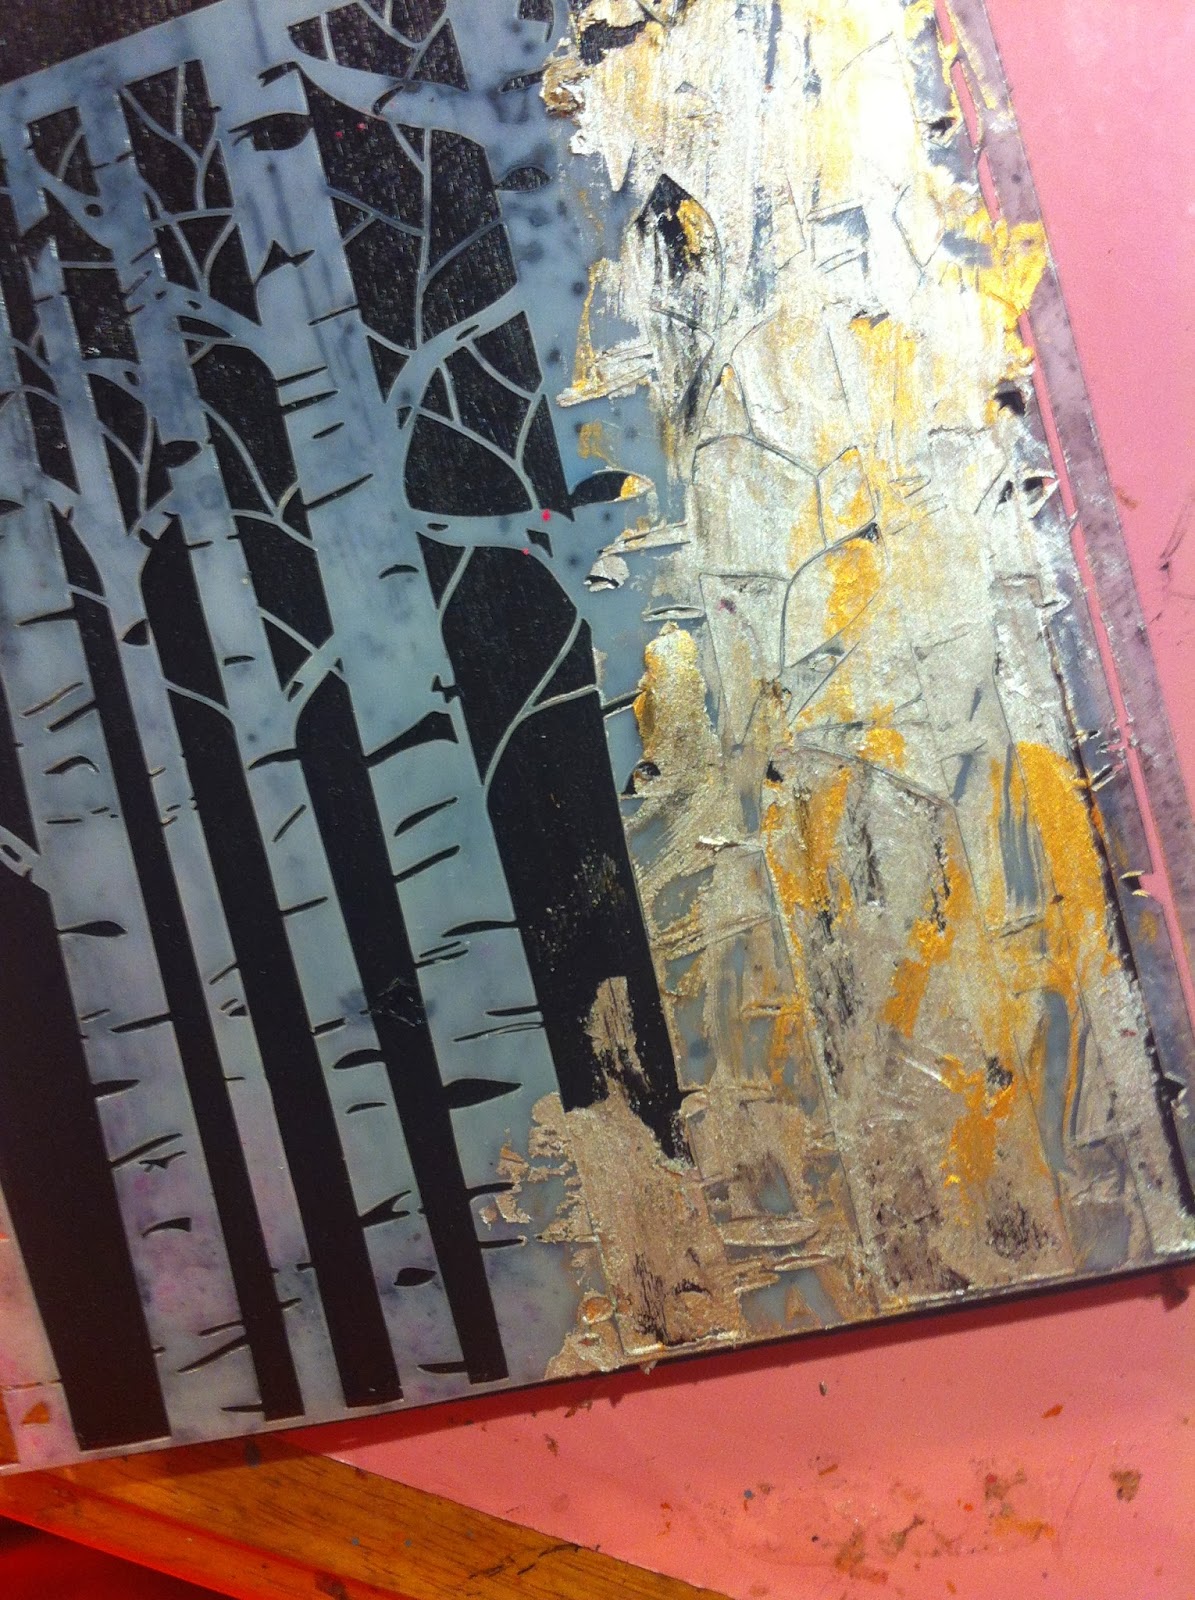
Here is a quick tutorial on how to make this background:

1) First...paint you wooden piece with acrylic paint. I actually added a little gloss medium to my 2nd and 3rd layers because I decided I wanted more gloss. You can see the difference in the finishes:


2) I used a Forrest Stencil from Crafter's Workshop (it's one of my favorites!) The size is 6x6, so it was perfect for my 5x7 piece. 


3) The medium I used for my background is Viva Inka Gold in Gold and Silver.

4) Starting with my silver, I used a putty knife to draw my rub over my stencil. I would then occasionally grabbing a little of the gold as well. Continue this process until you have covered your whole stencil. 


5) Carefully remove your stencil and your done! Inka Gold is very good for this technique because it is so thick that it doesn't seep under your stencil. As you can see, all of the edges are very crisp.


I didn't go all the way to the top because I knew I was planning a big collage of elements up there. Once my elements were in, however, you'll see that I went back in at the very top and added a little bit more with my stencil. It made the piece more "finished." 

It has been "Thrilling" being a guest designer for Authentique Paper and hope I get to do it again sometime.

Remember...you can go here-Authentique Paper Blog-for more pictures and the full blog post.

Until next time...stay creative!

XOXO,
KERI

Tuesday, September 17, 2013

Bloom Where You're Planted

I have the awesome privilege of being a Guest Designer for Susan K Weckesser and today is my day to show off on her blog!


Check out more about this project on her