Pages

Showing posts with label Unity Stamp Company. Show all posts

Thursday, January 15, 2015

"This is my Happy Place" Art Journal with Faber-Castell Gelatos

Hello Lifers! 

Today, I wanted to share with you my most recent art journal piece.

I called it "This is my Happy Place."


I was searching through YouTube for something fun and creative to watch and I came across this video that Donna Downy did for Design Memory Craft. It was all out "drip techniques" using Faber Castell Gelatos.

<iframe width="560" height="315" src="//www.youtube.com/embed/QOb3M8MdOBs" frameborder="0" allowfullscreen></iframe>

It was so much messy fun, I had to try it right away.

First, I started by using white gesso on my two pages. Gesso is important because it (1) allow your paper to stand up to all of the moisture you will be putting on it and (2) it allows the paints and water to roll better across the surface. Donna talks about it in the video and shows some examples.

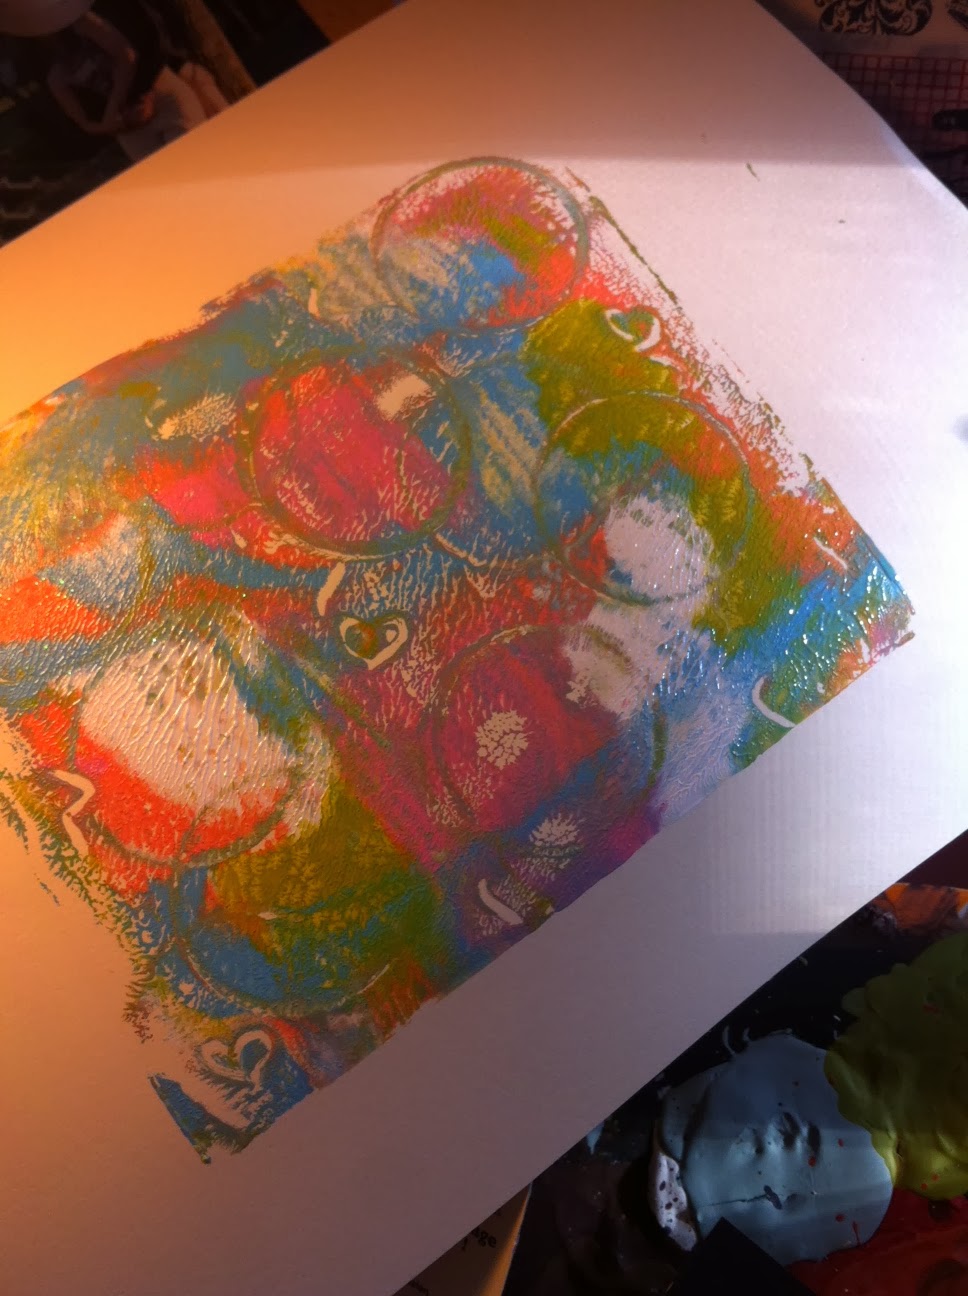
I started with a bright green, med blue, light blue and purple for my background (sorry...the set I bought didn't tell me the colors. {insert frowny face})

When I was done, I felt like it i looked like a forest, with the green being the foreground trees and the blues and purples being the shadowed trees. 


I used a Dear Lizzy Die Cut card with a  chevron pattern and my orange gelato to add a pop of color.


I also added some stamped images using Unity Stamp Company "Dwelling Dots" stamps from their November 2014 "Layers of Life" stamp set, using Heidi Swapp's Archival Ink in Aqua.


2014 was a rough year for me, so there has been a lot of moments of "gloominess", so I added watered-down blue and black acrylic paint, using the same drip technique, to represent that...giving the feel of rain. I also splattered random colors of acrylic paint and gelatos that had been mixed with water. 


My title comes again from another Dear Lizzy Die Cut Card I used as a stencil.


I added the words "stop messing with it" because I sometimes feel like my little forest is my happy place, but there are those outside my forest who want to be the ones to rain down on my happiness.

I added a little bit of drywall tape just to add some texture and filled in some of the squares with a black Faber Castell Pitt Artist Pen. 


My butterflies are made from a little thrifty secret...instead of spending money on chipboard or chipboard shapes, I cut these butterflies using a Stampin' Up Butterfly Die...from a cereal box!!


I stamped them with more Unity Stamps and Heidi Swapp Ink, this time in Navy and Aqua before adding gelato straight from the tube to the chipboard and smearing it around with a wet finger. Do add more depth, I went back with the same gelato color just around the edges. 


I edged my butterfly clusters with my water-soluble Scribe-All pencil in black and then added a little water-down gesso around them and some splatters. 


The butterflies, for me, are a sign of being reborn and leaving the old behind. They are in front of the rain and gloom because they choose to leave it behind.

I hope today inspires you to try something new...and to be like these little butterflies and fly beyond the gloom that life sometimes tries to keep you in.

XOXO,
Keri


Monday, August 4, 2014

Having fun with Unity Stamp Layers of Life!!

Good Day Lifers!!

I hope you are all having an amazing day!!

Today, I want to share with you a piece I made this weekend using
 Unity Stamp Company's Layer's of Life (July).

Layers of Life is a monthly subscription where you get a beautiful stamp set delivered to your door every month for only $11.99 (including shipping!) I have never been disappointed when I open my little envelope!

Here was July's Set:


I loved it so much that I sat down and made this mixed media piece the DAY I got it!


I made a Snap Guide to take you step-by-step through the entire process!


I hope you enjoyed today's project!! I would love to see your take on it...leave me a link in the comments!!

Have an awesome day and remember....make your art intentional...not an after thought!

XOXO,
KERI

Thursday, April 24, 2014

Farewell...Thanks for all the Memories

It's a sad day over on the Susan K. Weckesser Blog.

My last post as a Design Team member. 


Hop on over and check it out for more details and my farewell. 


XOXO,
KERI


Wednesday, April 16, 2014

Nature is the ART of God

Hello Lifers!!

It's my day on the Susan K Weckesser blog and today I am celebrating Earth Day!!


For more details, head on over to Susan's blog: My Sweet Earth

Until next time...remember...make your art intentional, not an after thought. 

XOXO,
Keri

Saturday, March 22, 2014

If Love Were Bricks....on the Susan K Weckesser Blog

Hello Lifers!

It is my day up on the Susan K. Weckesser blog and I am SUPER excited to show you my mixed media piece today.


For more details...head on over to Susan's Blog: My Sweet Earth . 

Have a great day!!

XOXO,
Keri 

Thursday, March 6, 2014

Double Down Thursday...WHAT?!

Hello Lifers!

Well...this has never happened before, but I am on 2 BLOGS ON THE SAME DAY!

WHAT THE WHAT?!

Here's a little info on both...be sure to click through links for more info and photos!

SUSAN K. WECKESSER

It's my day over on the Susan K. Weckesser Blog!!

Today, I am sharing this great project featuring Susan's Whimsical Paper and Heidi Swapp's Memory Files.


You can check out the full details over at Susan's Blog: My Sweet Earth,

BELLA CRAFTS QUARTERLY

For those of you not familiar with Bella Crafts Quarterly it is a quarterly online craft publication that is completely FREE!! Yes...FREE! Want it printed? The lovely ladies of Bella Crafts will print it and ship it for just the cost of printing and postage. 

Today, I have the honor of being a guest blogger on their blog.

I am sharing this amazingly thrifty spring wreath that I made for $15...including spray paint!


Check it out here-Bella Crafts Quarterly Blog-for a complete tutorial and price breakdown!


Enjoy!!

XOXO,
KERI

Wednesday, February 12, 2014

Let's get "Tickled Pink" with Susan K. Weckesser!!

Hello Lifers!

It's my turn over on the Susan K Weckesser Blog "My Sweet Earth" and today I am sharing my canvas called "Tickled Pink."


I made this canvas by framing a Prima Marketing Acrylic Transparency (painted with Tattered Angels Glaze) inside a frame I made by stamping Susan's In Circle Me Stamp by Unity Stamp Company into almost dry modeling paste. 

Here are a few of my steps to help you visualize the process:

1) The Transparency

The transparency is 6x6 and was actually part of a 12x12 transparency that featured 4 different styles. I liked this one because of the little window.


I actually flipped it over and painted on the back to that when you saw it from the front, the black lines were still crisp. All the painting on the back was done with Tattered Angels Glimmer Glaze. I also added some clouds using Susan's "Celebrate Your Day" Stamp from Unity Stamp Company using Ranger Archival Ink and painted those as well. 


2) The Border:

To Make this easier, I cut a scrap piece of paper to 6x6 and lightly tacked it in the center of my canvas, leaving my boarder. (I cut the hole out to make it easier to remove later.)


Once your remove the scrap paper, keep it! You'll need it in a minute! 

Next, using your heat gun and working in small section, dry your modeling paste until no longer sticky, but still move-able. This process might take a little trial and error-trust me!

When you've reached the right consistency, firmly press your stamp into the paste, being careful not to let it slide.


While working around your frame, rotate your stamp so that you get different angles to your texture. 


See...trial and error! :) I got a little hasty on a couple of spots and ended up with modeling paste on my stamp. NOTE!! Clean the modeling paste off your stamp ASAP...it is a PAIN to get off once it's dry.

For the base color, I used Tattered Angels Plain Jane Baseboard in Plain Daffodil. Place your scrap piece of paper back in the middle to keep your lines crisp.


And then...I messed up...I did not take pictures of the next steps. So Sorry!

Here is a couple of close-ups so you can see the texture better:


To get this effect I followed these steps:

a) Once my yellow was dry, I took 5 colors of Tim Holtz Distress Ink (Pickled Raspberry, Broken China, Peacock Feathers, Peeled Paint and Spiced Marmalade)  and randomly rubbed it over my surface. I used my finger to soften it a little.

b) Next, I used Tattered Angels Plain Jane Simply Sheer in Burlap to tone my colors down a little. Keep this very light...you're wanting to tone down...not cover up.

c) Once I reached this point, my frame was still matte and it looked wrong next to my shiny transparency, so lastly I added some Tattered Angels Glam in Chandelier over the top. (A little JMO: Chandelier is the best GLAM color if you are looking to start a Tattered Angels collection. Because the base is clear and the chunky glitter in iridescent, it is very multi-purpose and less intimidating than other Glam colors.)

3) A little Finishing Touch:

To add a little finishing touch to my piece, I had these great acrylic butterfly stickers I had bought at Hobby Lobby that I thought would be a perfect addition.

Because the back was sticky, I had to do my Glaze painting on the front, so I had to be a little cautious to stay in the lines (not a fun job for someone like me! LOL!)

Here is what it looked like in the light before I added it to my project:


So there you go!

I hope you will give this technique a try. Share your link in the comments...I would LOVE to see what you do!

Until next time...choose to make your art intentional..not an after thought.

XOXO,
KERI


Monday, February 3, 2014

Art Journaling on Mixed Media Monday

Hello Lifers!

It's time for a little Mixed Media on Monday! Are you ready?!

Today, we are going to be working on something that is a little new for me...art journaling! 

I have this Pinterest Board called WORD , where I pin all of these great sayings and quotes and then...what? They just sit there, occasionally pinned by others, but I never really look at them again.

So...using my One Little Word for 2014...I am CHOOSING to use them by putting them into an art journal where they are a little more accessible and so I can take time to really think about them and absorb them while I work on my art journal.  

Here is my first!


Here's a few pointers on how I made this page.

BACKGROUND 

My background is actually very simple. When I was gelli plating some paper to use for my words and my bird (I'll explain that technique in a minute), the brayer I used was covered in paint, so I simply rolled the extra pain on to my page.

To get my black chevron pattern, I used Frog Tape in their Chevron Pattern in stripes across my page. I then lightly dry brushed black acrylic paint over the entire surface. 


This is what it looks like as you're peeling it up. I LOVE the crisp lines FROG Tape gives you! (And yes...those are Mickey House PJ pants! LOL!) 

BACKGROUND TEXTURE

To add texture to my background, I did a couple of things:

1) I used acrylic paint on some of my rubber stamps instead of ink. I feel like it gave it a little more bold and solid appearance. 


The gold is a little harder to see in the pictures, but it adds some nice detail. 


You can also see that I added some stamps using Ranger's Archival Ink because it is permanent and a strong black. All of the stamps I used for this project are designed by Susan K. Weckesser for Unity Stamp Co.. They include: A little bit of Washi, Celebrate your Day, Splatter and In Circle Me. 

2) Next I stamped a vine using white acrylic paint and a Claudine Hellmuth foam stamp called "Nature" (the bird from that set is used on this page too!)

I felt like it was a little flat, so I added a little gold to the top of the leaves and some black to the bottom. 


3) Lastly, using a Hobby Lobby Stencil and Tim Holtz Distress ink in Salty Ocean, I added random blue circle all over. 


BIRD AND WORDS

For my bird and my words, I used the same technique. It's similar to the technique called "gelli plating" but since I don't have a gelli plate (which is an actual brand and a technique) a friend of mine at Alumilite (which specializes in casting resin products) made me a fantastic on out of their Amazing Mold Rubber. The great thing about making your own from mold rubber is that you can use it for this technique as well as a surface for doing resin work!

Here is my completed "gelli" print.

This is easily obtained in a few steps:
1) Add small drops of paint to your rubber/gelli plate.
2) Run a brayer over the entire surface to smooth surface out, but not blend colors. (Remember out background? The extra paint on this step becomes the foundation for this whole project!)
3) Use random things to make impressions in your paint (lids for circles, buttons, gems.) I also used the end of a paint brush to make little hearts.
4) Place your paper over your plate and lightly brayer over the back. Keep it light or you will lose the texture you added with you found objects.
5) Carefully peal it up and let it dry!

For my bird, I knew I wanted just an out line, so I painted just the outline of my bird stamp with acrylic paint and stamped on to my dry gelli print.


My words were hand painted on another gelli print and then cut and adhered. 


I hope you enjoyed this art journaling piece. I really enjoyed making it!

Until next time...remember friends...Chose to make your art intentional...not an after thought.

XOXO,
KERI


Wednesday, January 15, 2014

Create Your Happy Day!!

Hello Lifers!!

Happy 2014...how is the new year treating your so far?

I had hoped to blog a little earlier than 15 days into the new year, but between snow days and traveling to Anaheim for CHA it's been a little crazy around here.

CHA Anaheim was this past week (January 10th-14th) and I can't WAIT to share all of the things I learned and amazing things I saw. Look for that post coming soon (probably in 2 parts...it was THAT good!)

While I was away, it was my turn over on the Susan K. Weckesser Blog, My Sweet Earth.

I hope this little card inspires you to "Create Your Happy Day!!"


For Full Details, head on over!


Until next time...make your creativity a choice...not an after thought.

XOXO,

KERI

Friday, December 20, 2013

Quick and Sweet Gift over on the Susan K. Weckesser Blog!

I'm always super excited when it's my day on the Susan K. Weckesser blog!

Head on over there today and see my quick and sweet last minute gift idea...the beautiful altered bottle (in it's former life it was a maple syrup bottle from The Fresh Market!)


Tuesday, December 10, 2013

Feeling Sketchy Post for Susan K Weckesser!

Yesterday was my day on the Susan K Weckesser Blog My Sweet Earth!

Normally, I am not a scrapbook sketch person, but when I saw this one on The Paper Issues Instagram feed, I knew I had to use it:


I saw those triangles and I immediately thought: Susan's Celebrate the Simple Stamps for Unity Stamps!


Here is what i came up with:


I used Basic Grey's Persimmon line because I thought the colors went so well with my vintage photo (and yes...that is me WAY back in 1983!)

Wanna see more?

Click Here to head over to Susan's Blog!

Until Next time Friends!!

XOXO

KERI

Monday, September 23, 2013

Blog Hopping with the Susan K Weckesser Crew!!


Welcome to the 2013 Susan K Weckesser Inc Design Team Back 2 School Blog Hop.  Our Design Team and Guest Designers have created a week’s worth of great projects to bring you inspiration and fun -- all themed around Back 2 School. 

We encourage you to visit each member’s blog, leave a comment and maybe find a new blog to follow.

 After you have visited all participating team member’s blogs, go back to THE STARTING POST at Susan K Weckesser’s My Sweet Earth Blog and leave a comment letting us know which project either inspired you or touched your heart.

 Don’t worry, you have all week to take your time and go through the blogs. We’ll feature a few each day at Susan K Weckesser Inc, but will draw names from comments left on THE STARTING POST for our grand prize.

Here is the list for ALL team members, but again don’t panic, we will highlight a few each day so you can come back and visit a few at a time if you want because we know how busy you Moms – and Dads – are! You have until Saturday night 11:55 PM CST to leave a comment at Susan K Weckesser’s My Sweet Earth.

HERE WE GO!!!!

I'm so excited to be an All-Star Guest Designer with Susan K. Weckesser and this week the designers and guest designers in her crew are having a little back to school blog hop!

You can't have "Back to School" with out first having an AMAZING summer, right? So I wanted to gather all of our summer fun in one place.

Here is my little project:


This sweet little album measures just 4.75 x 4.75, but holds an amazing 18 pictures! 

How you ask?

ENVELOPES!!!

By chaining envelopes together, you can form a versatile album in any size and shape you need!

Click HERE for a full tutorial I did on my blog last year on the basics of making an envelope album.


As you can see, it folds out into a fun according shape that makes it easy to display.


This is how you get 18 pictures in such a small album! Hidden behind each picture is a card that holds 2 more pictures and journaling. I fell in LOVE with these square envelopes I found at Hobby Lobby! Adding my 4x4 square Instagram pictures made this album go together in a snap because there was no picture trimming! I didn't even have to cut paper for my inserts...I simply cut the cards in half that came with my envelopes. Easy Peasy! 


 I wanted to keep things simple because the pictures and paper were so great. I used a little Washi Tape (My Mind's Eye, Carta Bella and Queen and Company) and some wooden pieces (Studio Calico and Hobby Lobby) to accent the fun prints and colors of Susan's Paper. Using Susan's stamps from Unity Stamp Company on the wooden pieces gave them instant character!

I also used her "Celebration of Simple" pennant stamps by Unity Stamp Company to create my journaling spots on each page. Creative NOTE: Changing the placement of each spot keeps the album from feeling uniform when you reuse an  image like I did!


Here is a little side-view!

Here is a complete list of products used on this project:
Flowers: Michaels, Prima Marketing, Petalloo, Hobby Lobby
Envelopes and Inserts: Hobby Lobby
Twine and Adhesive: Canvas Corp
Paper: Susie B Studios (Susan K Weckesser)
Washi Tape: My Mind's Eye, Carta Bella and Queen and Company
Wooden Pieces: Studio Calico and Hobby Lobby
Pens: Sharpie and Sakuro
Ink: Ranger
Stamps: Susan K Weckesser for Unity Stamp Company
Rub-Ons: Fancy Pants Designs
Alpha Stickers: American Crafts

I hope you enjoyed my little project and it inspires you to remember all the summer fun you had now that the craziness of back to school is here!

Until next time creative friends, happy hopping!

XOXO,

KERI